First thing to do is all the cutting out and preparation ready for assembly.
One of the things I’ve learnt at college, as well as in my own experience, is that it pays dividends to have as much preparation done before starting any sewing. The number of times I have ground to a halt because I haven’t interfaced a crucial piece of fabric doesn’t bear thinking about.
When cutting out, unless you have a predetermined cutting plan as for a commercial pattern, it’s always best to layout and cut the largest pieces first, and then fit progressively smaller pieces around them. So first I cut the backs and the skirt panels (see below).

You may notice I am now using some curious long grey things with handles. These are Cloth Weights and are used to stretch the pattern piece out while cutting and to prevent any unintended movement of fabric or pattern. I first used them at college and found how good they were, so I had to get myself at set – at some expense – but well worth the investment.
Next I cut the fronts, side panels and sleeves (see below).

Then I need to prepare the front panels ready for putting them in place. The upper chest is built up with layers of scrim (a coarsely woven hessian) and felt padding, as well as iron-on interfacing to stiffen the body of the coat.
I have marked all the positions of the pieces on the pattern piece, so use this to get them correctly aligned on top of each other (see below, far left).
The layers being the interface on the bottom (glue-side down); the scrim on top; and the felt padding on the very top (see below, centre left).
All of these layers are sewn along a single diagonal line just under the fold-line of the lapels (see below, centre right).
This is then carefully ironed onto the back of the front panel (see below, far right).

The benefit of doing it all this way, means the upper chest support is firmly sewn to the fronts, but no stitching shows through to the outside, since the stitch only goes through to the interfacing.
 To demonstrate the support the interfacing gives, I took a photo of the front before anything was added to it (see right). I then took a similar picture after I had finished work (see far right). The lapel is already wanting to roll at the right position.
You don’t need me to tell you how striking the difference is!
Over on the Tennant Suit Blog in the entry Interfacing On The Inside, I explained that interfacing comes in Light-weight, Medium-weight and a Heavy-weight versions that determine the resulting thickness; and each then comes in either a Standard or Ultrasoft option, which controls it’s drape and flexibility.
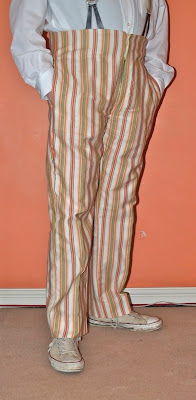
The fabric I am using, as you can see from above, is quite limp, so I will need to interface certain parts of the coat to get the result I want.
I don’t want the Five Coat to become too stiff, so I will principally use the Ultrasoft, though different weights depending on the part of the coat I am working on.
For example, the front need to be relatively firm, so I have used the Medium-weight there; but the skirt needs to be more fluid, so I use the Light-weight for that.
The sleeves and the back do not need facing at all.

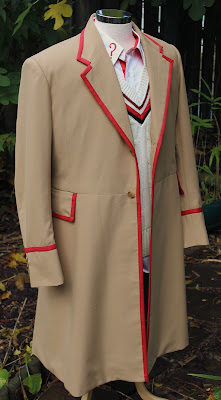
In fact, this can be seen from some of the images of Peter Davison in the original coat (see above). Notice how in this picture, the back of the coat and sleeves are creasing a lot more than the front panels. The creases seem to stop dead at the side seem.
With enough of the body cut and prepared, I can start making the coat up – next time . . .


No comments:
Post a Comment
Note: only a member of this blog may post a comment.